Author: Alina Khoma
CEO of bavka, Montessori educator
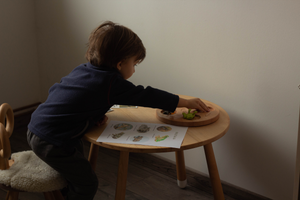
Geography in the Montessori method is not about memorizing names on a map, but about a deep, sensory discovery of the world. One of the most beloved activities for children in the Culture area is exploring land and water forms (lake/island, gulf/peninsula, etc.).
This material helps the child structure their knowledge of the planet through touch, visual perception, and action. While three-dimensional form molds are traditionally considered a classic element of the Montessori classroom, they also demonstrate incredible effectiveness within home education.
Below is a comprehensive guide to the sequential presentation of this material, perfectly suited for both professional certified educators and conscious parents creating a developmental environment at home.
.png)
Fundamental Montessori Principles in this Activity
Before moving on to the presentations, it is vital to understand the inner mechanics of the material:
-
Direct Aim: To learn to visually and tactually recognize and name the main geographical land and water forms.
-
Indirect Aim: Development of spatial thinking, preparation for future work with maps, vocabulary enrichment, and fine motor skills development.
-
Control of Error: Built directly into the material itself. For example, if too much water is poured and it spills outside the form boundaries, the child sees this visually (the water floods the "land"). With cards, the control of error is the exact visual matching of the contours.
-
Points of Interest: The beauty and realism of the illustrations, tracing the contours of the shoreline with fingers, the process of coloring the water blue, and independent discoveries made during discussions.
Required Materials: Setups for Class and Home
To ensure a complete cycle of activities, you will need a basic set of materials.
| Material | Description for the Classroom | Adaptation for Home Learning (Homeschool) |
| Land and Water Form Trays/Molds | Professional plastic or wooden waterproof trays. Ideally in a neutral color (such as beige or brown) for a sharp contrast with the water. | You can purchase a classic set, make them yourself from high-quality polymer or plastic, or even sculpt durable forms out of waterproof clay together with your child. |
| Water Pitcher/Jug | A clear, lightweight pitcher with a capacity of up to 1 liter. Water is colored with safe food dye. | A regular small glass or plastic pitcher that is easy and comfortable for a child to pour from with one hand. |
| Vocabulary Cards | Three sets of cards: schematic (abstract), realistic (photographs of natural features), and outline templates for coloring. | Cards can be printed on heavy paper and laminated. The main emphasis should be on high image quality. |
| Cleaning Tools | A small absorbent sponge and a tray or mat to catch moisture. | A child-sized sponge and a small cloth or wipe. |
Important Rule Regarding Cards: In the initial stages, use cards without text labels. The sole purpose of these lessons is visual recognition and oral naming. We intentionally separate geography from reading skills, which are addressed in other dedicated areas of the classroom.
.png)
Three-Period Sequence of Lessons (Presentations)
The learning process is systematically built from simple to complex: first, the child perceives the image visually, then adds a tactile sensory experience with water, and finally moves on to classification and abstraction using cards.
Stage 1: Introduction to Land and Water Forms (Visual Familiarization)
This stage sparks the child's interest and sets the first linguistic guideposts.
-
Preparation: Invite the child to work and bring photo albums with nature images or cards featuring realistic landscapes.
-
Presentation: Start with a conversation:
"Today, we are going to look at beautiful pictures of places around the world. We will talk about what we see and learn some new words."
-
The First Image (Lake): Show a clear photo of a lake.
"This is a picture of a lake. Can you see how the water is surrounded by land? A lake is a large body of water entirely surrounded by land on all sides."
-
Discussion: Engage the child: ask about the colors they notice, whether they have seen a lake in real life, and what people can do at a lake. Introduce the concept of a "shoreline".
-
The Second Image (Island): Show a contrasting picture.
"And this is an island. An island is a piece of land that is completely surrounded by water."
-
Repetition: Ask the child what the difference is between an island and a lake, focusing their attention on the relationship between water and land.
Stage 2: Working with Trays and Pouring Water (Sensory Experience)
Prerequisite: The child must already know how to confidently pour water from a pitcher within the Practical Life area, ensuring that accidental spills do not distract them from the geographical essence of the lesson.
In Montessori pedagogy, forms are always studied in contrasting pairs: lake — island, gulf — peninsula, strait — isthmus.
-
Arrangement of Material: Place two trays on the table (e.g., lake and island), a pitcher of blue water, and a sponge.
-
Presentation of the Lake: Point to the empty lake tray: "This is a lake form. Now, let's carefully pour water into it." Slowly pour the blue water into the indentation.
"Look, the water filled the indentation and is surrounded by land on all sides. This is a lake."
-
Presentation of the Island: Point to the other tray: "Now, let's pour water around this piece of land." Slowly fill the tray so that the raised land portion remains dry.
"Look, now the land is surrounded by water on all sides. This is an island."
-
Reinforcement (Three-Period Lesson):
-
Period 1 (Naming): "This is a lake. This is an island."
-
Period 2 (Recognition): "Show me the lake, please. Now, show me the island." (If the child makes a mistake, gently return to the first period).
-
Period 3 (Recall): Point to the island tray: "What is this?".
-
-
Cleanup: Ask the child to help soak up the water with the sponge back into the pitcher or drain it, and wipe the trays completely dry. This is a fundamental part of nurturing an inner sense of order.
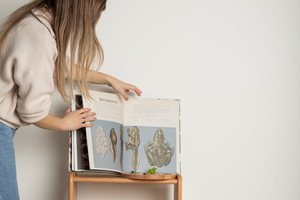
Stage 3: Matching (From Object to Card)
When the child has successfully worked with water and 3D forms, we transfer this experience onto a 2D plane—cards. This serves as the first step toward reading geographical maps.
Exercise A: Matching Object to Card
-
Arrange three familiar trays on the table (e.g., island, lake, peninsula).
-
Place three corresponding abstract (schematic) cards face down.
-
Invite the child to flip over one card: "Oh, you flipped over the island! Where is our 3D island?". The child takes the tray and places it next to the card, visually comparing the contours.
Exercise B: Matching Card to Object
-
Now the initiative shifts to the child: they choose any 3D tray mold, for example, the lake.
-
The adult goes through the cards, prompting the child to analyze: "Is this the lake card? No, this is a cape. How about this one? Yes, this is the lake! Let's place them together."
.png)
Exercise Variations & Material Extensions
To maintain the child's interest in the classroom or at home, utilize the variability of the method:
-
Realistic Photocards: Once the child easily matches the trays with the schematic drawings, offer them a set of cards with real photographs of famous locations (e.g., a photo of Madagascar or Lake Baikal) to find their three-dimensional counterparts.
-
Creative Extension (Coloring): Offer the child outline map templates. Show them how to color the land (e.g., brown or green) and the water blue using pencils or paints. The child can create their own little book of land and water forms.
-
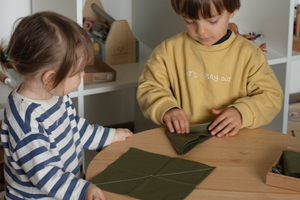
Working with Tactile Materials: Allow the child to independently mold the learned form using playdough or kinetic sand directly on the tray around the water. This is an excellent way to diversify home activities that children absolutely love.
.png)
Tips for Successful Practice: What to Look Out For?
-
Take Your Time: Do not try to introduce all 10 forms to the child in a single week. Start with basic contrasting pairs (lake/island), and only when they are fully mastered, move on to more complex combinations (lake system/archipelago, gulf/peninsula).
-
Mistakes are Guideposts: If the child spills water or matches a card incorrectly, avoid direct correction. The Montessori approach teaches us to calmly demonstrate the action again during a future presentation: "Let's look at this together one more time."
-
Ideal for Homeschooling: Working with water at home might initially seem like a challenge to parents due to potential mess. However, if you prepare the workspace in advance (using a waterproof mat or presenting the activity on a large kitchen tray), this exercise becomes a powerful tool for developing a child's deep concentration at home.
.png)
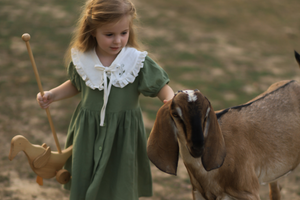
Montessori and STEAM
In the 3–6 curriculum, these forms open up the world of culture and geography. In cosmic education (6–12 years), they become the starting point for conversations about relief, climate, human settlements, and the environmental reasons behind why cities emerged exactly where they did. For STEAM education, this material seamlessly combines natural sciences (the structure of the Earth's surface), language (precise terminology), mathematics (shape, symmetry, contrast), and an inquiry-based approach through personal experience.
A Turnkey Solution for Classroom and Home Activities from the bavka Brand
To easily organize this comprehensive research cycle, the Ukrainian eco-friendly toy brand bavka has created a professional series of materials perfectly suited for both certified Montessori schools and cozy home activities within a homeschooling framework.
Combine bavka's 3D form molds with the educational workbook to give your child the joy of real scientific discovery!
.png)
.png)
 2014")
 2015")